Following our trials and tribulations as we attempt to remove all grains, many starchy vegetables and most sugars from our diet while maintaining our love of good food! We strive to make all of our recipes GAPS and/or SCD compliant. Note: We didn't know about "Grain-Free Gourmet" when we chose our name. We are not affiliated with those good folks.

Showing posts with label snack. Show all posts

Tuesday, January 17, 2012

Kale Chips

Do you think your kids won't eat vegetables? Try these. I am generally against recipes that require me to stand around doing repetitive work, especially when the fruits of my labor are then gobbled up in less than 10 minutes. But I have to make an exception for a recipe that gets my kids chanting, "Kale! Kale! Kale! We want kaaaaaale!" I think we all know that kale is a "super food" and these delicious chips have the added benefit of being crispier than potato chips!

Enjoy!

Ingredients

2 bunches kale (the flatter varieties are easier to work with, but any type will do)
1 Tbsp. extra virgin olive oil* (or other oil/fat, if desired)
Sea salt and freshly ground pepper

Method

Heat your oven to 250 degrees F. Wash kale and remove tough central rib (you can skip this step, if your kids will eat up to the rib, and you don't mind having chewed on stems around). Pat kale dry. Place in a bowl and coat with olive oil (I use my hands to rub the oil on all surfaces). Place kale in one layer on two baking sheets. Sprinkle with sea salt and pepper (you can leave out the pepper. I sometimes do). Bake in the oven for about 30 minutes or until leaves are very crispy (they will easily break apart). Allow to cool until they are easy to handle, then watch the feeding frenzy begin.


*NB, Dr. Campbell-McBride advises against heating olive oil. Personally I do not have a problem cooking with extra virgin olive oil at low temperatures (below its smoke point). I have not read any scientific studies that corroborate the claim that heating olive oil causes it to take on unhealthful properties. I would be happy to peruse any such studies that my readers might know about. (I'm not interested in links to claims, only to actual studies or reports of actual studies, where the journal of publication is cited). If you wish not to use olive oil, any fat would work, but the flavor would be different (though almost surely very tasty). Obviously hard fats would need to be melted first.


Tuesday, January 10, 2012

Almond Flour Brownies

Imagine my delight when I discovered that Dr. Campbell-McBride had decreed that cocoa powder was OK for us advanced GAPSters. Then imagine my sadness when I discovered that there were zero decent almond flour brownie recipes out there on the internet. Of course I had to fill the void. Some things are worth a little trial and error! I believe I have finally got it right. These babies could definitely give the old gluten-laden variety a run for their money. I made these today, and there is one left (only because I don't think anyone else realizes it!).

These make a dense, moist, chewy, chocolaty brownie.

So here it is in all it's simple glory :)

Ingredients

2/3 cup honey
1/2 cup melted butter or coconut oil
1 Tbsp. vanilla extract
3 eggs
1 cup almond flour
1/2 cup cocoa (I used raw cacao)
1/4 tsp. baking soda (this can be omitted)
1/4 tsp. sea salt (omit if using salted butter)

Method

Heat oven to 350 degrees F. Mix honey, butter, vanilla and eggs until smooth. (If omitting baking soda, beat eggs until foamy before adding in other wet ingredients.) Add almond flour, cocoa, baking soda and optional salt. Stir to blend. Pour into greased 8x8x2 inch pan. Bake for approximately 25 minutes, until center no longer jiggles and top feels cakey.

Cool on a wire rack at least until sides pull away from the edge of the pan before cutting.

Thursday, December 23, 2010

Lemon Cardamom Cashews

Not to toot my own horn, but these are unbelievably good!  I can't have many cashews because of the oxalate levels but these are worth suffering for :)

INGREDIENTS:

2 T butter or ghee
1/3 c honey
zest of 1 lemon
1 1/2 tsp cardamom powder
2 cups of cashews (preferably soaked and dehydrated)

METHOD:

Dry toast the cashews in an iron skillet or other heavy-bottomed pan on medium heat until they are slightyl browned and crunchy.

Add the butter, allow it to melt, then add the other ingredients.  Stir them to combine and cook until the liquid has bubbled for about 5 minutes.

Pour the mixture onto a cookie sheet lined with greased parchment paper and allow to cool.

Store in an airtight container preferably in the refrigerator.

Chili almonds

These are sweet and spicy and make a nice gift.

INGREDIENTS:

2 T butter or ghee
3 T honey
1 1/2 tsp salt
1 tsp chili powder
1/2 tsp cumin
1/4 tsp chipotle powder (or cayenne powder)
2 cups almonds (preferably soaked and dried)

METHOD:

If the almonds are not crunchy, dry toast them in an iron skillet (or other heavy-bottomed pan) on medium heat until they reach desired level of crunchiness.

Add the butter to the nuts and allow it to melt, then add the other ingredients and thoroughly stir them together. 

Continue heating and stirring until the liquid bubbles for about 5 minutes, then pour the mixture out onto a cookie sheet lined with greased parchment paper and let it cool.

Store in an air-tight container, preferably in the refrigerator.

Friday, November 19, 2010

Chicken Liver Mousse

This is essentially a recipe from the Cheeseslave blog called Balthazar's Chicken Liver Mousse.  Amazingly chicken liver has become the favorite food of my 9-year-old son so I have been exploring different ways to cook it.  I am personally not a huge fan of it but this was pretty good, especially if you use the bourbon (I substituted bourbon for cognac).  I also followed her example and baked these without the water bath, and they were fine.

Friday, May 21, 2010

Mixed Spiced Nuts

This recipe is a slightly modified version of the one I found in the book "Fat: An Appreciation of a Misunderstood Ingredient, with Recipes" by Jennifer McLagan. That book is great, and I highly recommend it, but many of the recipes will need to be skipped or adapted for our purposes. These nuts are really delicious and definitely company-worthy.

Ingredients

4 cups mixed unsalted nuts (I used pistachios, slivered blanched almonds, cashews and walnuts here)
1/2 tsp. ground coriander
1/2 teaspoon ground cumin
2 Tbs. butter (I've tried it with unsalted and with salted, cultured butter, and both worked fine)
2 Tbs. honey (I made it with one Tbs. the first time, and it was good, but 2 is better)
1 Tbs. dried rosemary (crushed in palm) or 2 Tbs. chopped fresh rosemary
dash cayenne pepper
1 1/2 tsp. fine sea salt

Method

Preheat the oven to 350 degrees F. (180 C.)

Place the nuts on a rimmed baking sheet and bake for 10-20 minutes, stirring a few times, until browned to your liking. (I like mine browner).

While the nuts are toasting, place a small heavy-bottomed pan over medium heat. Add the coriander and cumin, and toast until fragrant, about 30 seconds. Remove from heat, and add the remaining ingredients, except salt.

Place the pan over low heat and stir constantly until the butter and honey melt and dried rosemary softens, about four minutes. Add salt and keep mixture warm.

Transfer the nuts to a large bowl, pour the spiced butter on top, and stir until the nuts are well coated. Taste and adjust the seasoning, if desired. Allow to cool completely for the nuts to crisp up. Store in an airtight container for up to one week.

Wednesday, April 14, 2010

Layered Popsicles

I'm always looking for a way to make food that is fun and interesting for my kids.  Sometimes it's about making things in fun shapes, other times it's about presentation, and other times it has to do with color.  Popsicles are fun, but they had lost their novelty for us, so I came up with this version.

You can make as many layers as you want in as many colors as you want.  Layers can be either fruit/veggie juice, like popsicles, or can be ice cream.  You can use coconut ice cream, peach ice cream (which can be made with other fruit such as pear or mango), or kefir cream ice cream

I found that layers work best with both a strong flavor as well as an ingredient to give it a bright color.  Here are some ideas for layers:

orange/carrot
lime/kale or other leafy green, or celery
raspberry or strawberry/beet
lemon/golden beet

If you want to sweeten the layers, heat the juice just enough to dissolve some honey in it (to taste).  If you put a layer of vanilla ice cream between two orange layers, it's like a creamsicle.

To make the popsicles, pour a layer of juice into the bottom of each mold and let it freeze.  Once the bottom layer is frozen (or nearly frozen), then pour another layer of juice or spoon a layer of ice cream in.  Continue this process until you have created all of your layers.  Inserting the stick or handle can be a bit tricky since you can't stick it into an already frozen layer.  The molds that I have have a handle with a small stick, so it just got frozen into the last layer.  If you do it this way, you have to be very careful when removing the popsicles from the molds or they can come apart at the layers.  It would work better to put long sticks in that go through each layer, and have some way of holding them up, such as covering the molds with plastic wrap or foil that will hold the sticks in place.

Saturday, March 27, 2010

Tomato Melts

This was a quick and oh-so-delicious impromptu lunch the other day and it would lend itself to so many variations!  The first batch (pictured here) were simply slices of tomato with provolone cheese melted on top in the broiler to a nice brown.  We later experimented with "pizza toppings" such as green olives and mushrooms, but this could also be faux-mexican (with taco meat and cilantro) or an open -faced version of many sandwiches, such as ham and swiss or a tuna melt.  There are just so many possibilities!

Thursday, March 25, 2010

Deviled Eggs

These are yummy, and just in time for Easter :)

Ingredients

4 hard boiled eggs, peeled and cut in half lengthwise
2 Tbs. homemade mayonnaise
1 tsp. homemade curry powder*
Sea salt to taste
Celery seeds or paprika for garnish

Method

Remove yolks from whites and place in a bowl. Add mayonnaise, curry powder, and salt. Mash together with a fork. Spoon (or pipe with a pastry bag) yolk mixture back into whites. Sprinkle with celery seeds or paprika.

*I used Alton Brown's curry recipe. It was serviceable, but not great, in my opinion--too much cardamom and not enough complexity. I'll keep experimenting with this.

Thursday, March 18, 2010

Amoreena's Peanut Butter Fudge

This simple and absolutely delicious recipe was given to me by my friend Amoreena, and has been a favorite snack for the past week.  It is also a great way to eat coconut oil for those who don't enjoy eating it straight.

INGREDIENTS:

1 c coconut oil
1/2 c peanut butter
honey to taste
dash of salt
1 tsp vanilla extract

METHOD:

Melt the oil in a saucepan on very low heat. 

Pour the oil and remaining ingredients into a blender or food processor and blend until smooth.

Pour this mixture into an 8 x 8 pyrex dish (or similar glass dish), and place in the freezer.

This fudge is best stored in the refrigerator or freezer. 

Monday, March 8, 2010

Dairy-Free "Cheez-It" Crackers

These crackers are about the closest I've come yet to a "junk food" flavor, at least a savory one.  They taste a lot like a Cheez-It or goldfish cracker.  These are based on a recipe I found in an episode of Raw World TV, which you can view here on YouTube.  They present the recipe as a cheese sauce as well as a cracker recipe, however when I made it it didn't have the "cheese-like" texture that theris did.  Maybe you need a Vitamix to make it into a sauce.  It might be worth playing with this for those who are really wanting a macaroni and cheese type sauce.

To make it as crackers, follow the same basic recipe, which is to put one red bell pepper, one cup of macadamia nuts, some salt and cayenne pepper in the blender or food processor and blend until smooth.  Then spread it thin on a dehydrator sheet and dehydrate until it reaches the desired level of dryness.  At 105 degrees this took me well over 24 hours, so I would use a higher heat.  If you want to make crackers in cute shapes I would pull it out partway through, when it is still pliable, and cut it with cookie cutters, then put it back to continue drying. 

Wednesday, January 13, 2010

Jam


This is a very simple way to make GAPS-legal jam.  It is a bit runnier than "normal" jam, but still works well.  You can adjust the level of sweetness to suit your preference.  I made my jam not very sweet at all, figuring that I could always mix honey in later for flavor.  Also, if you make it less sweet, then you can use it in savory sauces and dishes (such as apricot-rosemary turkey breast).

I used apricots, but pretty much any fruit that you would normally make jam from would work.  I simply cut up the fruit into large pieces- probably into quarters or eights- and then put it in a large stock pot.  I covered the fruit with cold filtered water and brought it to a boil, then turned it down to a simmer.  I think I added the honey at this point- I'm not sure it matter exactly when you add it. 

Simmer the fruit for several hours until it thickens and cooks down to a consistency you like (keeping in mind that it is thicker when cool).  Keep a close eye on it while it cooks so it doesn't scorch, and add more water as needed.  Once it has thickened, remove a little and let it cool enough to taste, and add more honey if desired.


Once the jam is done you can either can it or freeze it in small containers or ziploc bags.  I suggest making large batches in the summer when the fruit is in season and less expensive, but many of us on GAPS don't have as much control over when we are ready for certain foods.  You can easily make this in smaller batches during the winter as well.  Even though it may be more expensive, it can still be cost effective compared with purchasing SCD-legal jam online.

This jam is delicious on toast, in sandwiches, on pancakes or french toast, in crepes, or as a filling in desserts.

Tuesday, January 5, 2010

Baked Seed Crackers and Pizza Crust


I originally came up with this recipe as a pizza crust (which, by the way, I think is the best one so far), but quickly realized that it would also work well as crackers.  As a pizza crust, it's a little on the crispy side (which I like), and as crackers they are a little on the soft side.  If you like your crackers crispier, then simply leave them in the oven longer. 

INGREDIENTS:

1 c ground pumpkin seeds
1 c ground sunflower seeds
1 tsp salt
1 large or 2 small eggs
1-2 tsp olive oil
optional- crushed garlic, chopped parsley, dried Italian herbs, or any other ingredient for flavor

METHOD:

Preheat oven to 350 degrees.

Ideally the seeds should be soaked in water overnight, then dried in the oven or dehydrator on a low setting.  Once dry, they can be stored in jars so they are ready when you want to cook.

Grind the seeds before measuring out 1 cup each.  I like to grind mine in a coffee grinder that I use only for seeds, nuts, and spices.  Blend all ingredients with an electric mixer in a medium bowl.  The dough will be very stiff.  Vary the amount of olive oil based on how dry the dough seems- if it is wet enough with one tsp, then omit the second one.  If you are adding herbs, garlic, or anything else for flavor, do it now.  For the batch in the photo, I added 2 cloves of garlic and a handfull of chopped parsley (additional flavors are good for both crackers and pizza crust).

Grease a cookie sheet and sprinkle it with coarsely ground pumpkin seeds.  Pat the dough into a ball shape and place it in the middle of the cookie sheet.  Beginning in the center and moving outwards, squish the dough flat with your hands.  I suppose you could also cover it with waxed paper and roll it out with a rolling pin.  I try to get it to about 1/4 of an inch.  For pizza crust, you may want to make the edges slightly raised, for crackers, make it flat.

 For pizza- bake for 20 minutes (or longer if it looks very wet).  Remove from oven, top with sauce and toppings, then return to oven for as long as it takes for the toppings to get hot and cheese to melt if you are using cheese.

For crackers-bake 25-30 minutes, depending on how crispy you like them.  Cut them into squares with a pizza cutter.  If you left them in a long time to get crispy, you should cut them quickly while they are still a little soft.  Top with hummus, yogurt or kefir cheese, or any other topping you like.  If you made them on the softer side, you could cut them with cookie cutters to make them look fancy.

Thursday, December 24, 2009

Bacon Cheddar Potted Cheese


When I was a kid, one of my favorite flavors of the holidays was those salty cheese spreads that came in the Christmas food packages.  I loved how they were so creamy and salty, and probably loved them partly because of the MSG.  A friend recently posted a recipe online for one of these spreads and when I saw it I knew I had to make it work for GAPS.  I think this is even better without the MSG.

INGREDIENTS:

2 T coconut oil
12 oz raw cheddar cheese
8 oz bacon (I used Organic Prairie brand)
2 shallots
1 T bourbon
1 cup kefir or homemade yogurt (you could probably use coconut milk if you don't have either)

METHOD:

Chop the bacon and cook in the coconut oil until crispy, remove and set aside.

Fry the shallots in 2 T of the fat left from cooking the bacon, until caramelized.

Chop the cheese into small cubes and put into the bowl of a food processor along with the bacon, and pulse until well blended.  Add the kefir, bourbon, and shallots and continue to blend until the mixture is creamy. 

At this point the mixture is a thick spread or dip, that would go well with veggie sticks, apple slices, crackers, or coconut bread or nut butter bread..  You can easily adjust the consistency by adding in more kefir, if you want a thinner dip.  For an extravagant salad dressing, or dressing for vegetables, you could thin this down a lot with oil and vinegar as well as more kefir.

Thursday, December 17, 2009

Cinnamon Nut Cookies


This is essentially a recipe that I found online but I don't remember where.  If it looks familiar please let me know who to credit :)  It's simple, my kids love it, and is a great way to use some of those egg whites that I always have left over from other things.

INGREDIENTS:

2 egg whites
2 cups of nut flour or nuts that have been soaked and dried
1/4 cup honey
1 T cinnamon

METHOD:

Preheat the oven to 350 degrees.

Beat the egg whites until frothy.

If using nut flour, fold it into the egg whites.  If using nuts, grind them into flour (I use a coffee grinder for this, or you can use a food processor too), then fold them in.  Fold in the other ingredients.

Drop teaspoonfuls of the batter onto a  cookie sheet and bake for 15-20 minutes, until nicely browned.

For variation, you can use different combinations of nut flour and spices as well as flavoring extracts or lemon or orange zest.  

Tuesday, December 8, 2009

Cracklins


Sorry if this grosses some of you out- it's an old time treat that has become one of my boys' favorite snacks.  It's so simple, and a great way to use more of our food and have less waste.  Between making these and broth with the bones, we pretty much use up the whole chicken these days. 

To make cracklins, simply heat fat or oil for frying in a large skillet and fry the skins on both sides until crispy.  I salt them as they are cooling down.  You can also shake on other seasoning if you like.  These are best eaten when still warm.

Monday, December 7, 2009

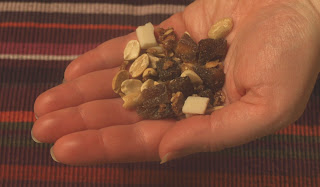
Trail Mix


It seems a little silly to post a recipe for trail mix as it's such a simple snack and one that is infinitely variable.  However, I came up with this particular blend that is a little more fancy than just peanuts and raisins and is really a treat.

Mix together:

2 parts nuts
1 part granola
1 part dried fruit (chopped if large fruit)
chopped GAPS "chocolate" coconut candy

When making the coconut candy for this, you can use the leftover bits from cutting it with cookie cutters, or you can roll it out and cut it into squares, than cut it into small pieces.  This is a replacement for chocolate chips so I was going for the equivalent size.  The coconut candy does get soft if not refrigerated so you may want to store this in the fridge.  I kept mine in the cupboard and didn't mind the softer texture.

When I made this, I used granola that had raisins in it, so for the dried fruit I added chopped dried apricots for variety.  I used peanuts but using different nuts and combinations of nuts would give this some variety.  My friend Chris was just saying that hazelnuts and dried cranberries are a great combination.  There are so many ways of varying this recipe, I'm sure you'll find your own favorite way to make it! 

You can make this ahead of time and put some in plastic baggies and you have a convenient "take along" snack food, just as convenient as the old snack bars and junk food that many of us probably used to keep around for convenient snacks on the go.  It is also delicious enough to go into a Christmas stocking as a treat, especially if it were in a small tin.

Sunday, December 6, 2009

Lima Bean Hummus


It looks sort of grayish in the picture because I added black olives before I thought about how unappetizing that might make it look in the photo!  Honestly this tastes so good that my husband has wondered why everyone doesn't make hummus with lima beans.  This would work fine with other white beans that we're allowed on GAPS, but as they are higher in oxalates I decided to go with limas.

INGREDIENTS:

2 cups soaked and cooked lima beans
3 cloves of garlic
1 tsp salt (or more to taste)
3 T lemon juice
3 T olive oil (or more depending on how "wet" your beans are and the texture of hummus that you like)

METHOD:

Put all ingredients in the blender or food processor and blend to desired consistency.  Taste and adjust flavors.  You will undoubtedly find your own blend of ingredients that you like best. 

For variation, try adding olives, anchovies, roasted garlic, roasted peppers, dried tomato, or whatever herbs and spices you like.  If you find an especially tasty variation, please post it in the comments for us all to enjoy!

If you serve the hummus with sliced veggies for dipping it makes a nice side dish or even a light meal.

Sunday, November 15, 2009

Peanut Butter Brownies


This recipe is from Breaking The Vicious Cycle by Elaine Gottschall.  This was the first SCD recipe I ever made, back when I had just read BTVC and was convinced that we would benefit from the diet but equally convinced that it would be impossible for us to do.  This is still my favorite recipe from that book, and an excellent way to introduce anyone to how good this diet can be!

INGREDIENTS:

1 cup peanut butter
1/2 cup honey (I use 1/4 and find it plenty sweet)
1 egg
1/2 tsp baking soda (not GAPS-legal, it works fine if you leave it out)

METHOD:

Thoroughly mix all ingredients (I find an electric mixer works best).  Pour into a generously greased 8" x 8" baking pan and bake at 350 degrees for 25 minutes, or until an inserted knife comes out clean.   Do not overbake- these are so moist and chewy but get dry if baked too long.

Saturday, November 14, 2009

Bacon Ranch Chicken Wrap


The other day I went past a fast food restaurant with signs up for bacon ranch chicken sandwiches.  While the smell of that particular restaurant was far from appealing, I thought the combination sounded great and I had a strong sense of nostalgia for the convenience that such a sandwich would provide.  I had this version for lunch today and it was nearly as easy.

When I boiled a chicken last night to make stock, I set aside a small portion of the white meat to use today.  I like to have a batch of Teri's fabulous ranch dip in the fridge for easy snacking anyway, so whipping up a batch today was something I had planned on doing anyway.  We made bacon for breakfast so it was easy to set aside a strip to use for lunch.  While it took a little coordinating and planning ahead, it made for a very quick and satisfying lunch (simply combine the ingredients on a lettuce leaf). 

Copyright

All photographs and written materials are the sole property of the posters, as applicable by law, unless otherwise noted.